Sunday, January 27th, 2013
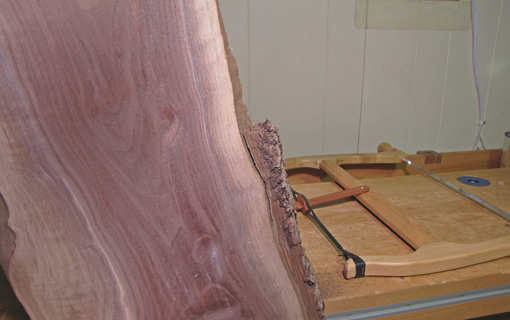
Projects featuring live edge wood can be fun and liberating as the gifts of nature guide the woodworker’s design. Though preferences vary in managing live edge boards, I like to remove all of the bark down to the sapwood surface, retaining and exposing thewonderful natural undulations of the wood.
Live, or “natural,” edge boards may have been dried with all of the bark on, or after most of it was removed. During the growing season, the cambium layer is fragile, making the bark easier to shear off. Either way, my goal is to remove all remaining bark without damaging the natural contours of the wood.
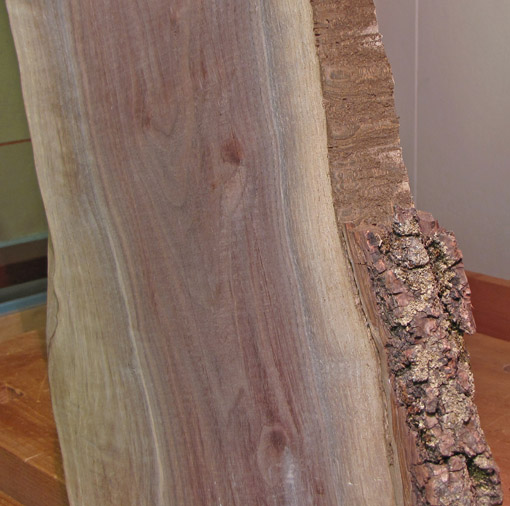
The walnut board shown here was dried with all of its bark so I began by removing the bulk of it with a bowsaw. A drawknife may also work well. This is not a job for a bandsaw or jig saw because you want the maneuverability and feel of a hand tool. In the soft inner bark, the saw almost feels like it is going through Styrofoam; the harder resistance of wood is a sign of going too far. To save work later, I get as close as I safely can to the wood, intermittently checking both sides of the board. It is easier to work with the board held vertically, if possible.
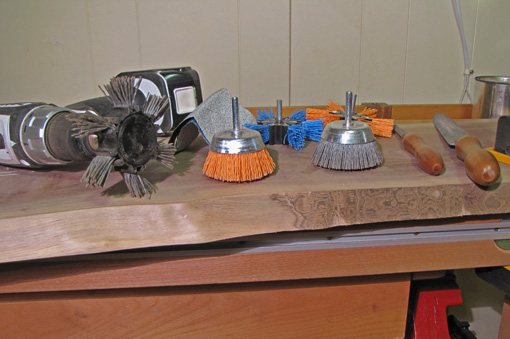
The next step is to use abrasives. Dico Nyalox brushes used in an electric hand drill work ideally. They are aggressive enough to remove remaining bark but not enough to reshape the wood. In most cases, an 80-grit (grey) flap brush is a good start, followed by the orange 120-grit. I brace the drill against my body and wear a dust mask.
Next, I use the less aggressive cup brushes, which, as I ramble the drill along the edge,act almost like a random orbit sander. The 80 and 120-grit cup brushes, followed by a light pass with a blue 240-grit flap brush, finish the job.
The photo below shows the result I like: cleaned up, but ruggedly natural.
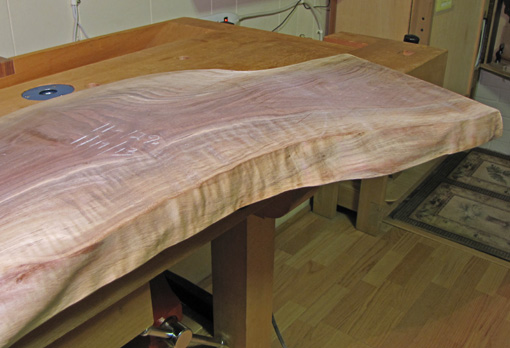
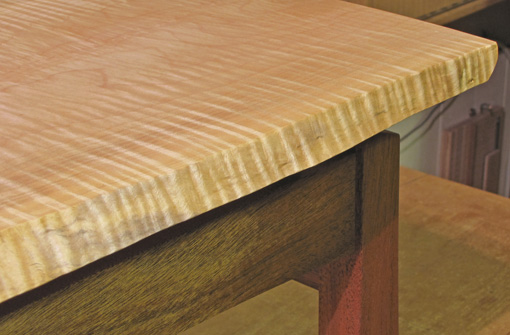
The edges of curly wood require special caution. The coarser flap brushes seem to impact the peaks of the bumpy, wavy edge to gouge tiny horizontal grooves that are difficult to remove. Depending on the species, I’ve found it better to work mostly with thecup brushes for curly wood. The photo below shows the edge of curly big leaf maple in a finished piece.
Notice the rasps and sandpaper in the photo showing the tools. “Natural” is nice, but occasionally I’ll “improve” on nature with a little cosmetic surgery using a coping saw, rasps, sandpaper, and maybe even fillers to alter a shape or defect that I don’t like, and to get the look I want. That’s part of the fun.
Full Article:


No comments:
Post a Comment